1. Settings in TWINT Portal
1.1 Shop registration
Log in to your TWINT account: https://portal.twint.ch
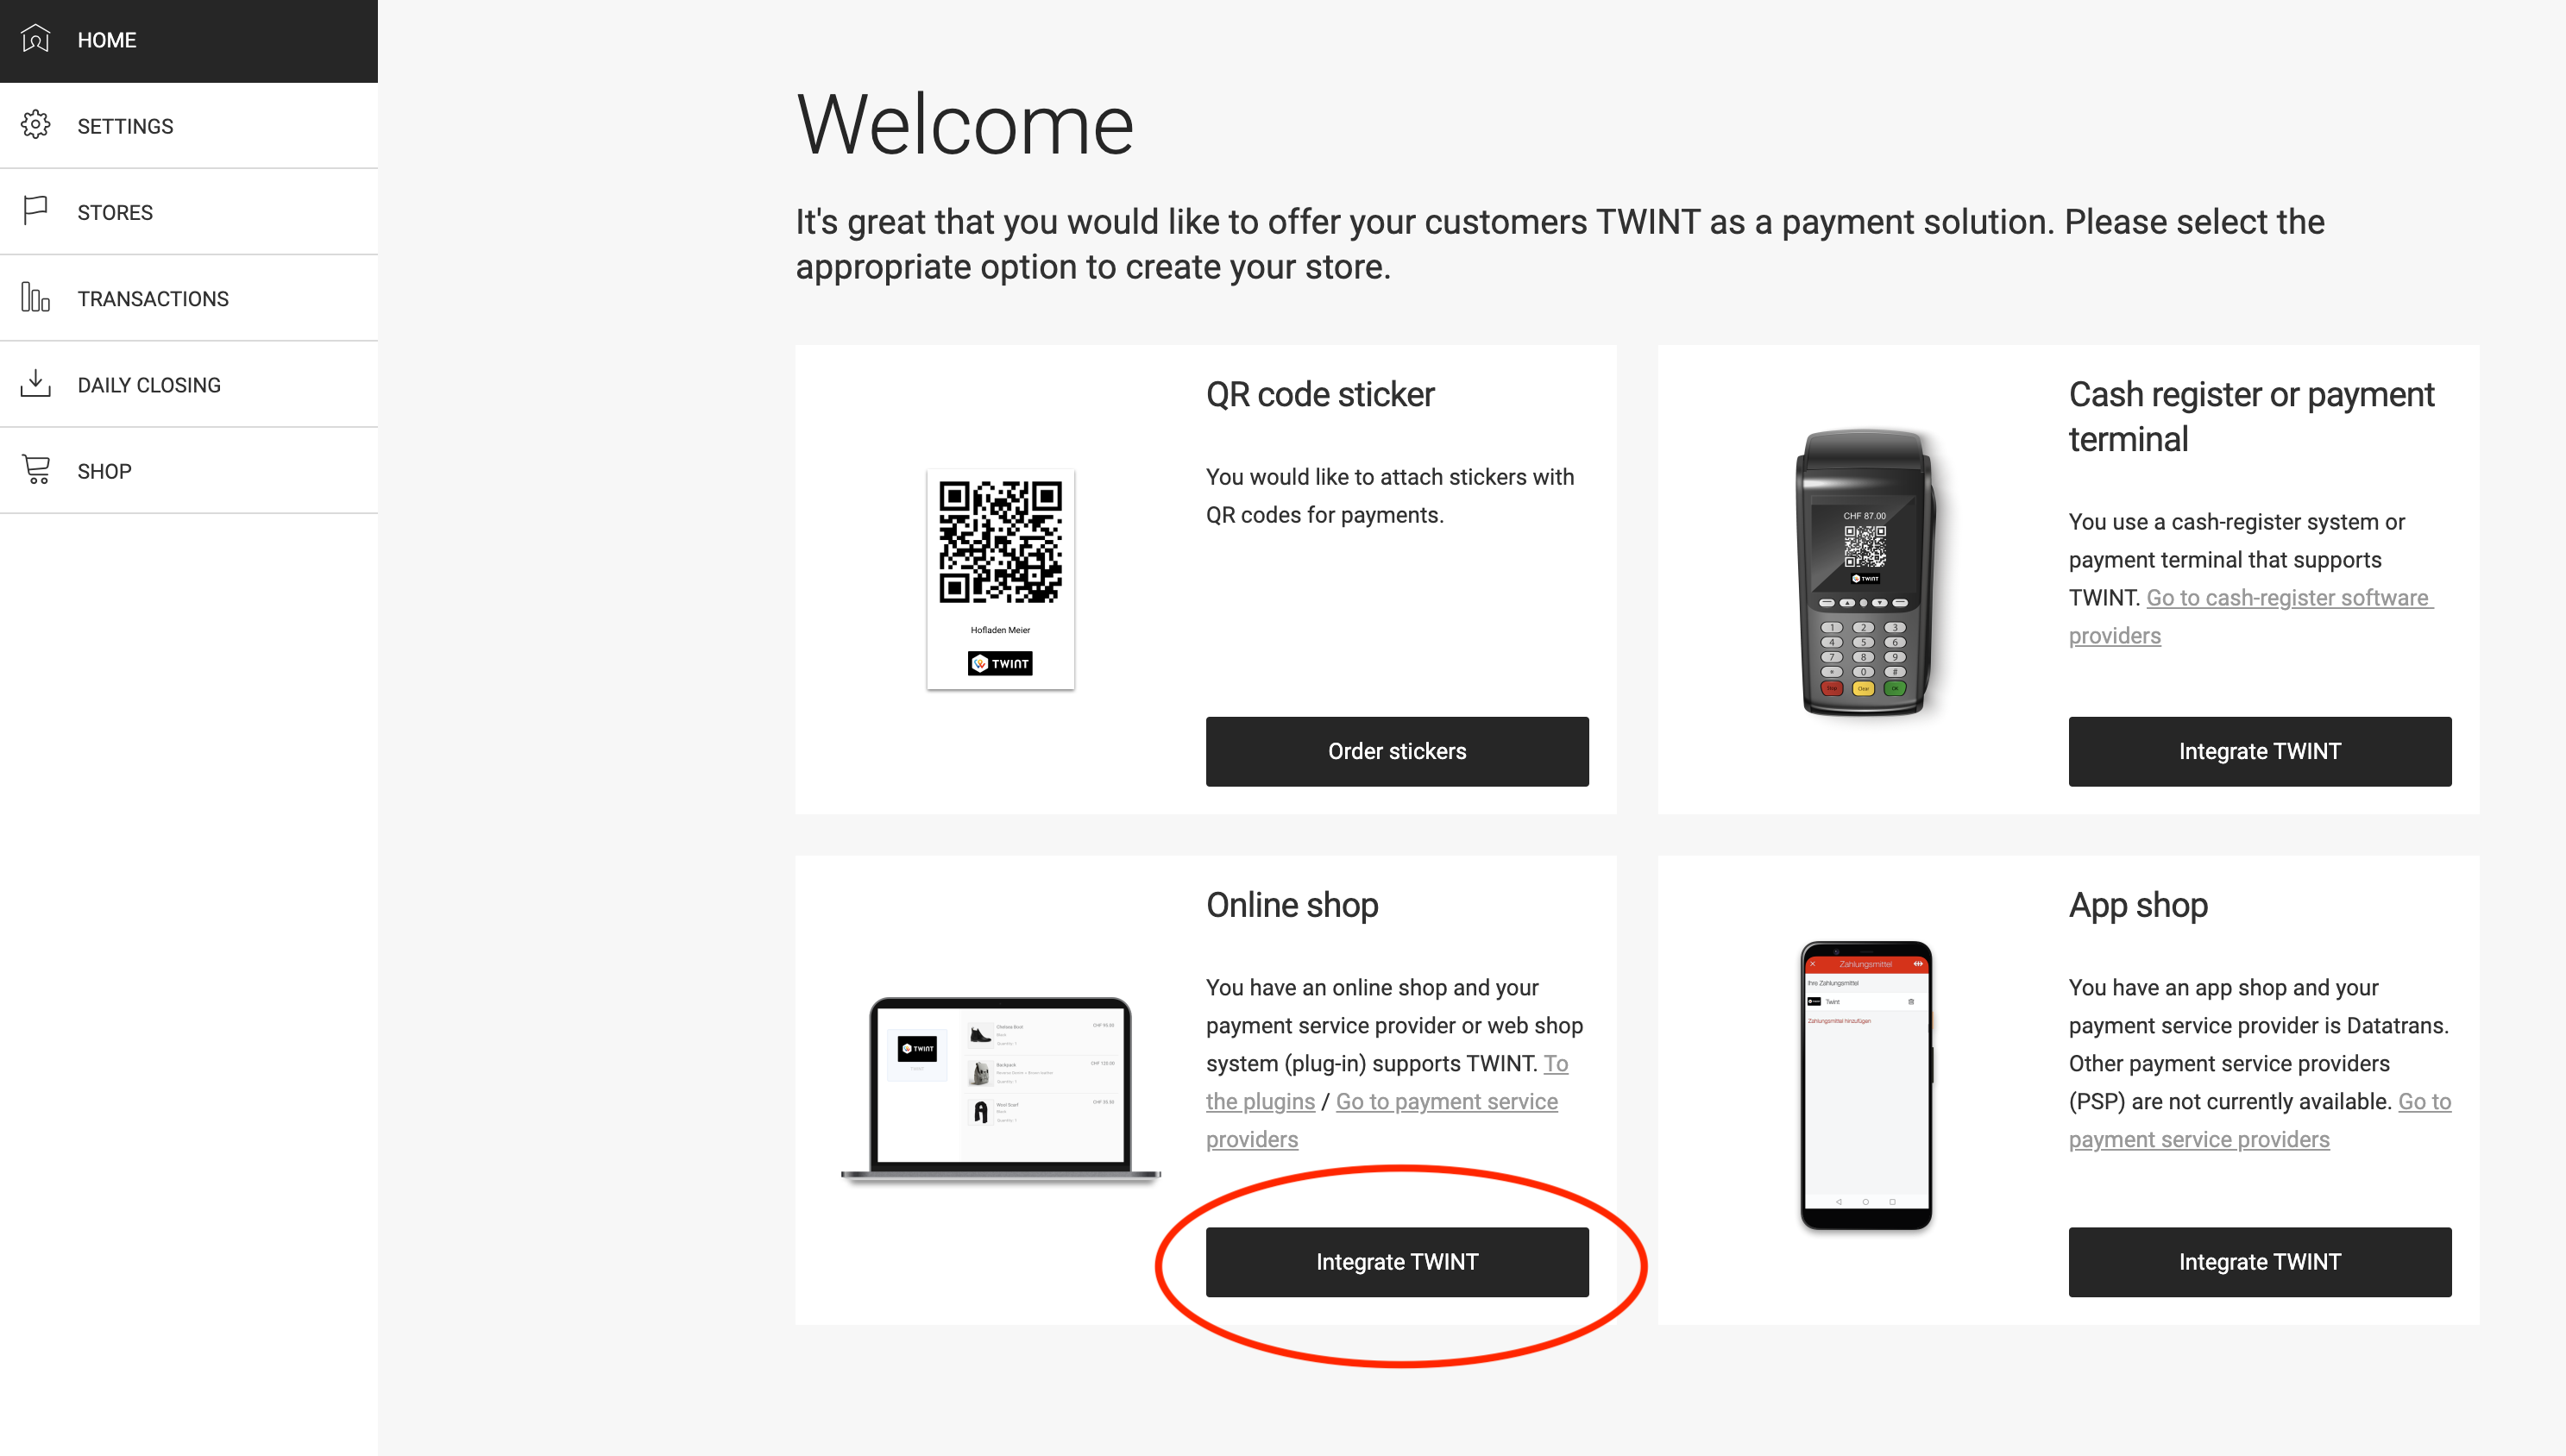
Go to “HOME” and then click on “Integrate TWINT” under “Online shop”
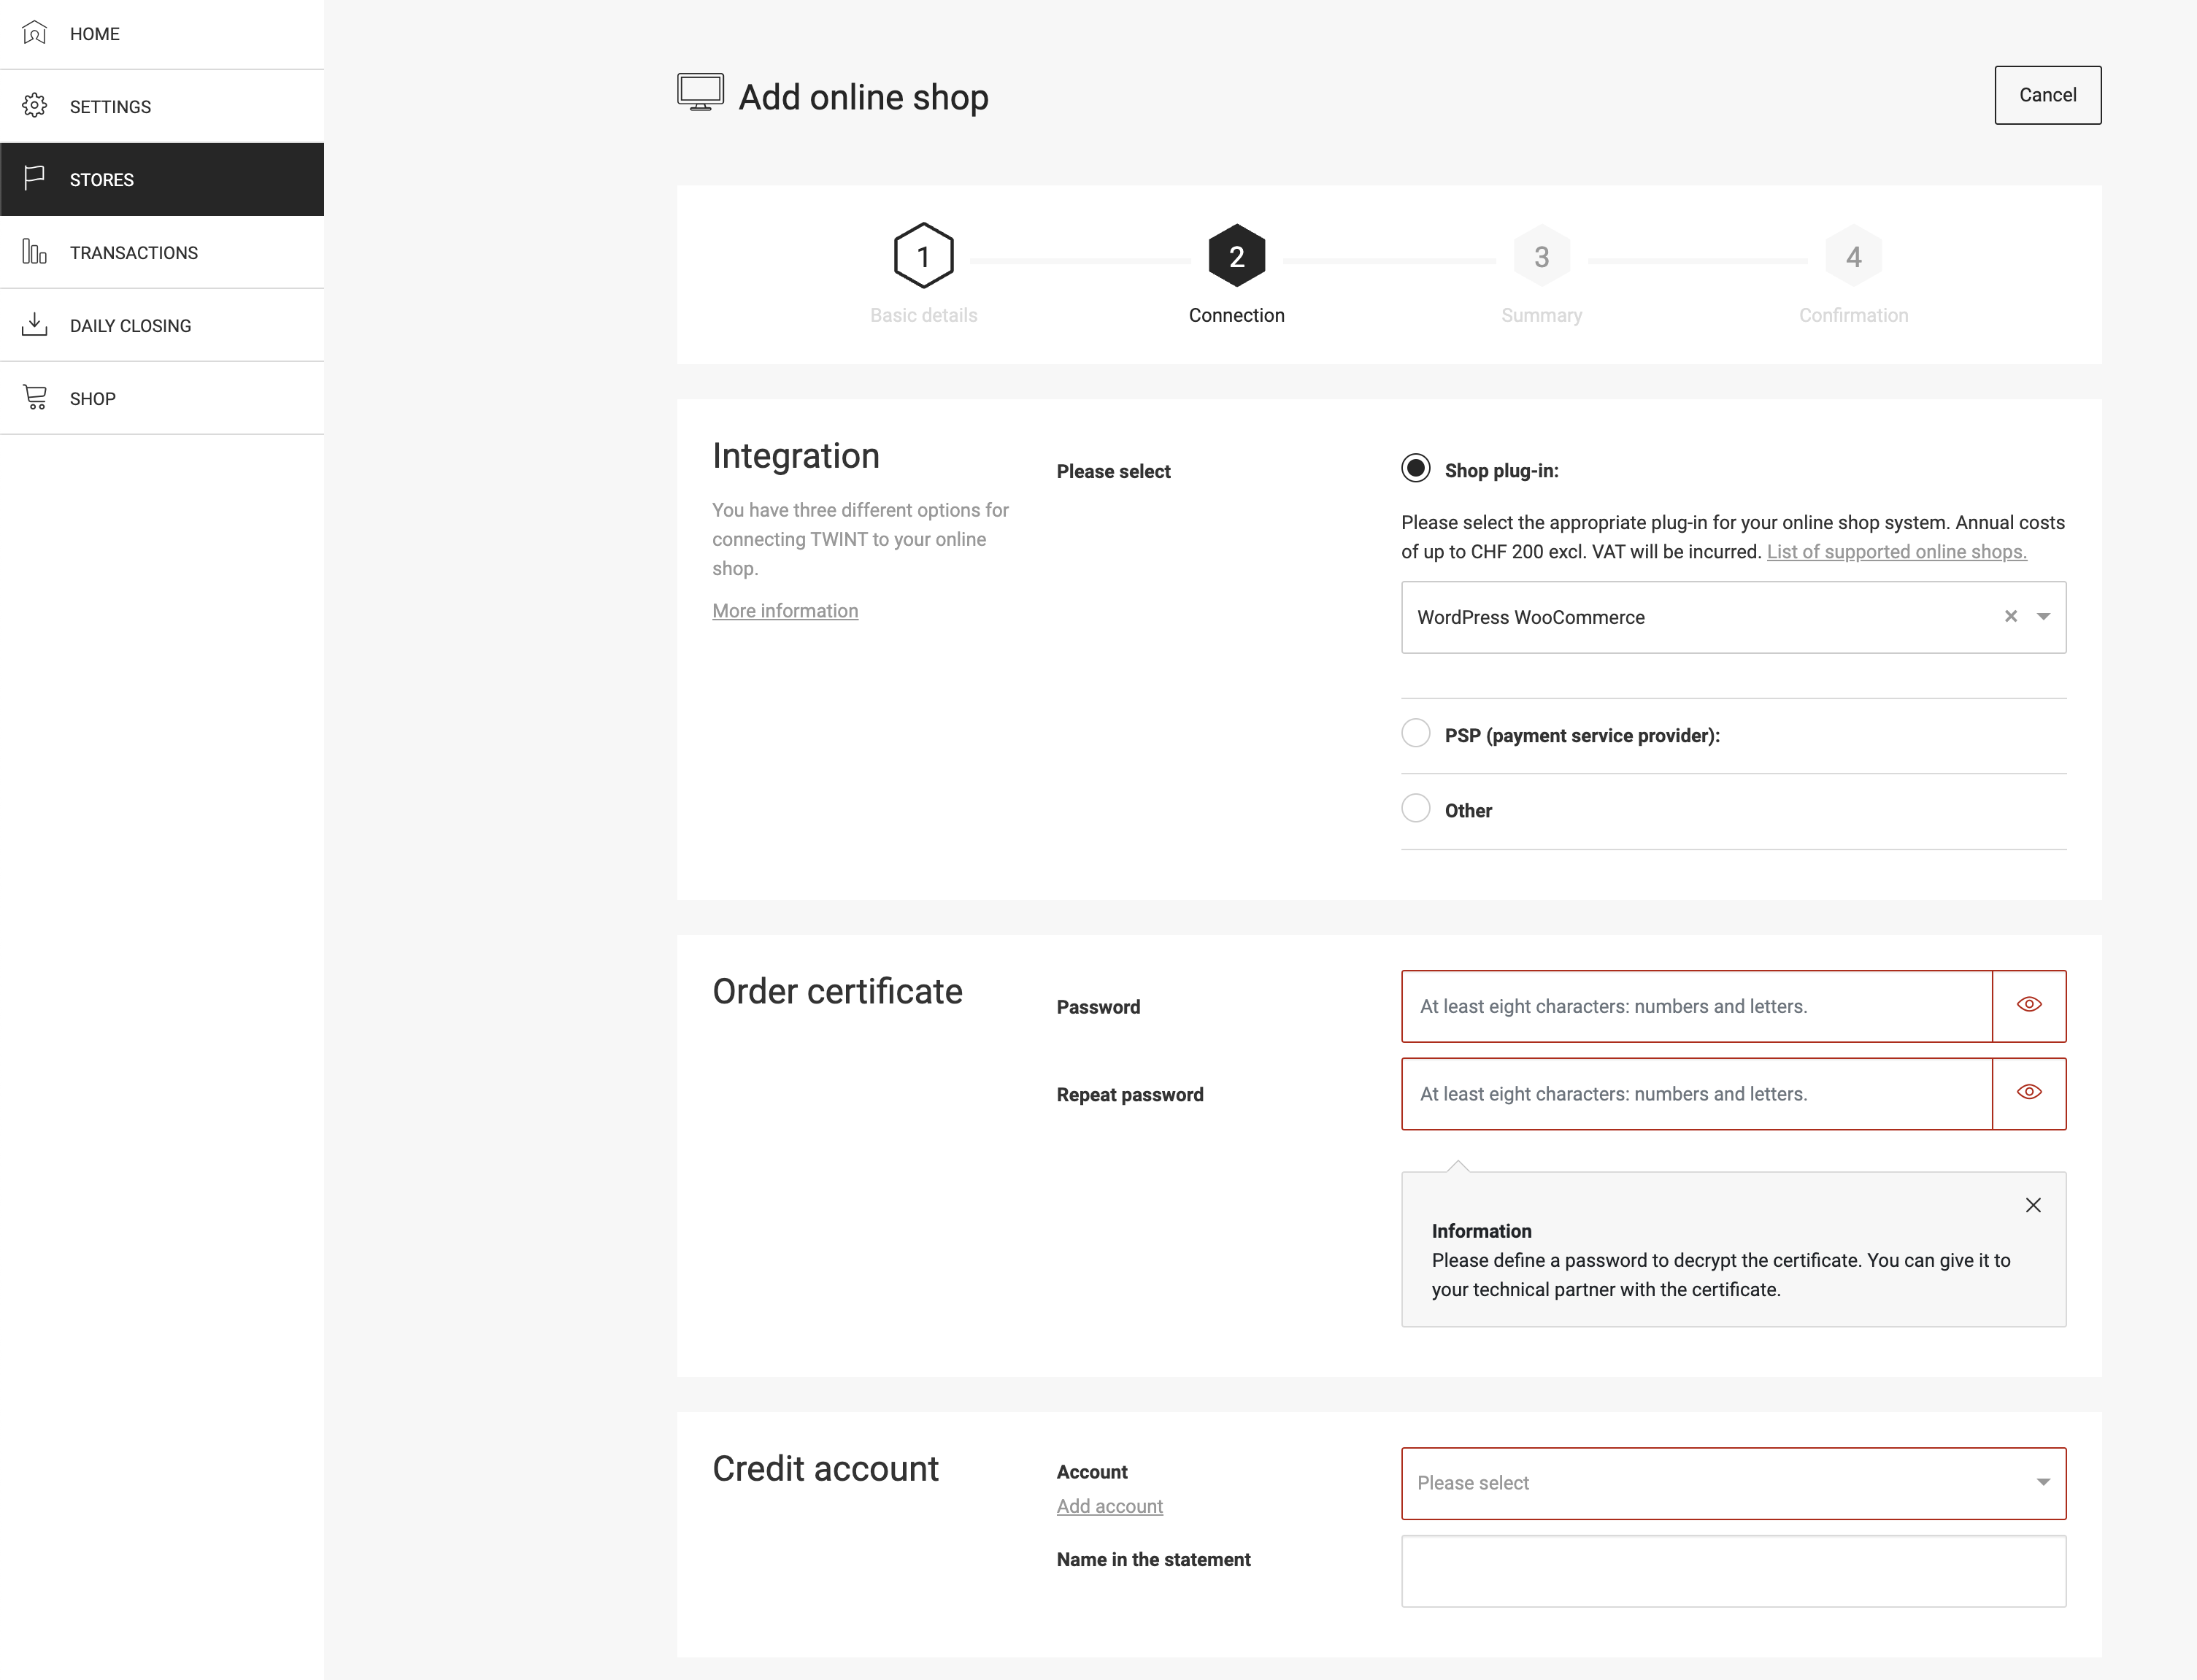
Fill in the basic information and in the second step (connection) select the integration “Shop plug-in” and “WordPress WooCommerce”.
When adding the first store, a certificate must also be created, which is required for the setup at WooCommerce. To do this, set a password under “Order certificate” and remember it or save it in a safe place. Important: The password will be required again later and can no longer be viewed after the certificate has been created.
If special characters are used for the password, only the following may occur: ~!@#%^*_+-={}[]:,./
The previously added bank account must be selected under “Credit account”.
After the registration in the last step the UUID will be displayed. Keep this value somewhere for later steps. To display the UUID again go to “Stores” and edit the settings of your shop.
On the same page you can also download the certificate, which will later be required for the WooCommerce settings.
1.2 Certificate creation
To connect your shop(s) to TWINT you need a valid certificate which you can create and download on the page “Settings -> Order certificate from SwissSign”. Then it has to be converted into the correct format.
The downloaded certificate must be converted from file type .p12 to .pem. There are three different ways to do this (only one needs to be done):
1. Automatic conversion
This is the easiest way to convert the certificate. The certificate will be converted to the correct format by the plugin if the PHP extension OpenSSL is enabled on your web hosting. Simply use the upload button in the TWINT settings in WooCommerce after you have entered and saved the certificate password.
2. Conversion using the command line
If OpenSSL is not enabled on your web hosting you can convert the certificate and private key to the PEM format using a command line tool (e.g. Terminal on Mac):
openssl pkcs12 -in twint.p12 -out twint.pem -passout pass:PASSWORD
Replace twint.p12 with the name of your certificate (path) and PASSWORD with a password to encrypt the private key in the PEM file. You will then be asked for the password you created in the TWINT portal when you created the certificate.
You can then upload the certificate to the server in one of the following two ways:
- Rename the converted .pem file to “twint.txt”(uploading PEM files is restricted be WordPress) and upload it by using the upload button in the TWINT settings in WooCommerce.
- Upload the PEM file to the folder /wp-content/uploads/mame_twint of your WordPress installation (create the folder if it doesn’t exist). Please make sure that the file is named “twint.pem”.
3. Conversion using an online tool
Alternatively you can also use an online tool, e.g.:
https://www.sslshopper.com/ssl-converter.html
You can then upload the certificate to the server in one of the following two ways:
- Rename the converted .pem file to “twint.txt” (uploading PEM files is restricted be WordPress) and upload it by using the upload button in the TWINT settings in WooCommerce.
- Upload the PEM file to the folder /wp-content/uploads/mame_twint of your WordPress installation (create the folder if it doesn’t exist). Please make sure that the file is named “twint.pem”.